Mastering SEO with Yoast: A Step-by-Step Guide for Beginners
In this comprehensive guide, we’ll take you through the process of mastering SEO with the Yoast plugin on your WordPress website, however, this guide only covers the free version of the plugin and therefore does not cover premium features such as AI-Enhanced suggestions.
Getting Started:
Before we set sail on this SEO adventure, let’s make sure you have everything you need:
- A website or blog hosted on the fully customizable version of WordPress from WordPress.org.
- Fundamental knowledge of WordPress/WP-Admin and plugin installation.
- Active social media accounts (Facebook, Twitter, Instagram, etc.).
- The Yoast SEO WordPress Plugin.
Understanding Yoast:
Meet Yoast, your new SEO sidekick! This powerful, free WordPress plugin is ready to rocket your website’s SEO to new heights. In this guide, we’ll delve into the installation and configuration process, shedding light on the Yoast SEO meta box and the array of tools available within the Yoast SEO Dashboard.
Installing Yoast:
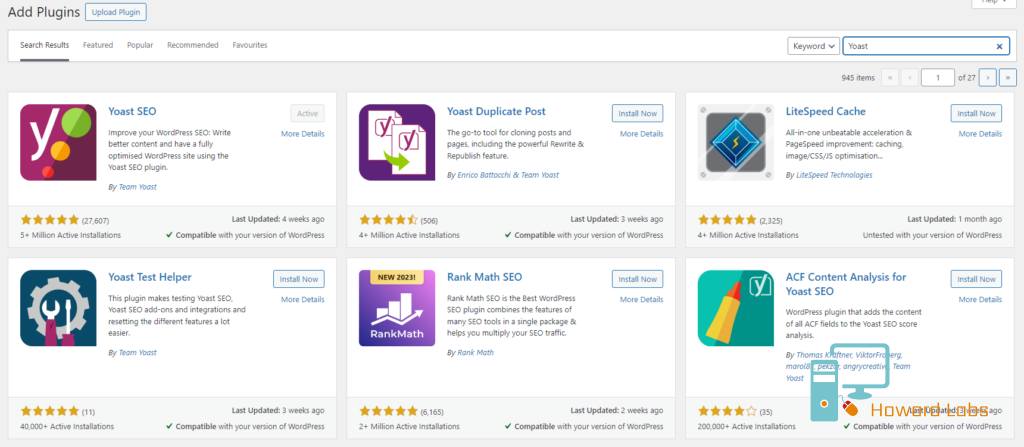
To install the Yoast plugin, log in to your Admin dashboard. Find the plugins tab, select ‘Add new plugin’, and search for “Yoast”. Once you have found the “Yoast SEO” plugin, click “Install Now” and proceed to activate.
The Yoast SEO Configuration Wizard:
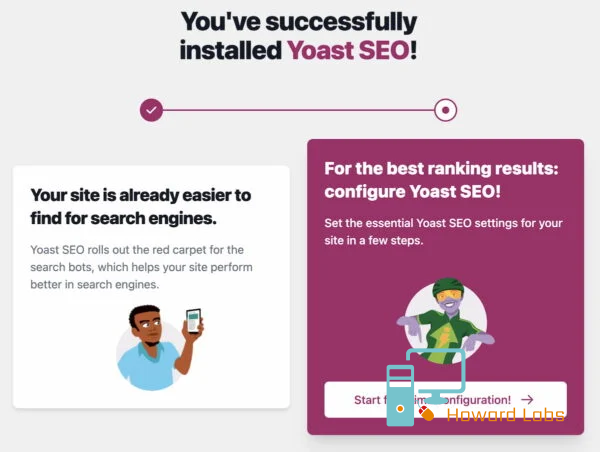
Now that you have installed the Yoast SEO plugin, it’s time to set it up for your website. You can access the Yoast SEO dashboard by clicking on the new SEO tab in your WordPress dashboard on the left. If this is your first time using the plugin, you should see an initial notice for First-time SEO configuration.
By clicking the configuration wizard link, you will get a simple to follow guide from the Yoast SEO plugin to help you set up all of the basic SEO settings:
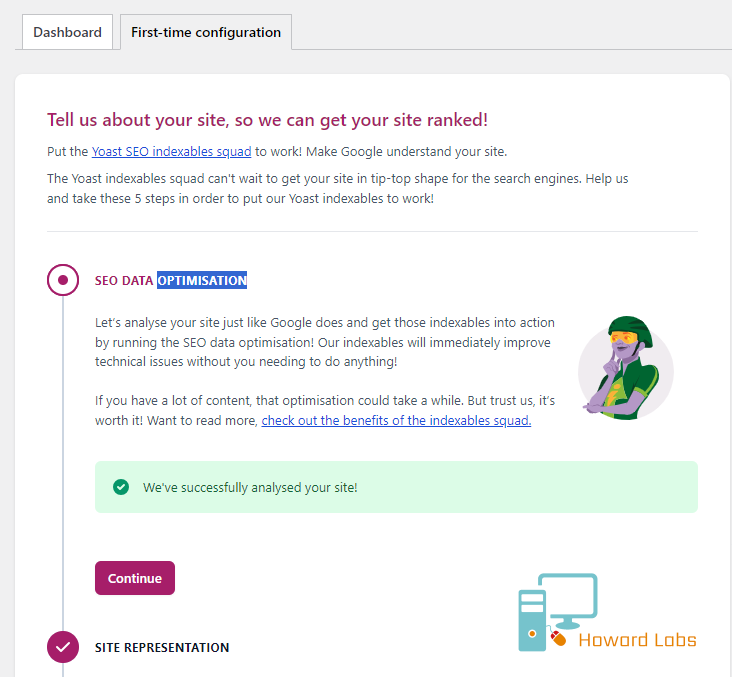
Section 1: SEO Data Optimisation – Getting your content seen!
The first section is ‘SEO Data Optimisation’. Here, Yoast scans your site and optimises content for your SEO targeted keywords.
Unless you’re working on a development site, you should always look to improve your SEO score, the higher your score, the better chance you have or ranking on search engines and having your content found!
Click to start the optimisation and proceed to the next step once complete.
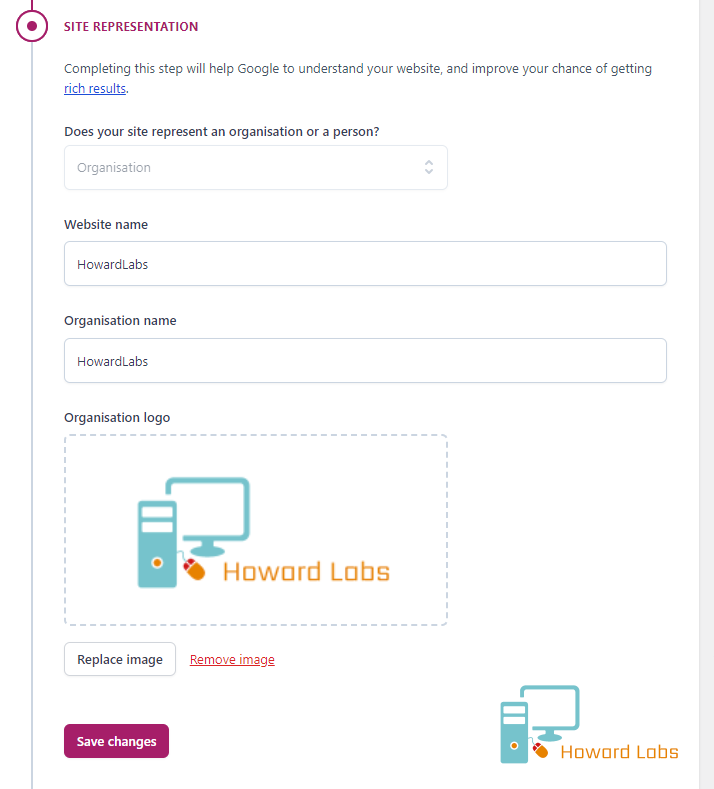
Section 2: Site Representation – Defining your look/brand!
The next section is “Site Representation“, choose the type of site that best represents the content you are providing.
This section and the option you choose helps Yoast SEO to configure ‘Metadata’ which describes to search engines such as Google, Bing and others, exactly what your site is about. This along with other information allows the search engines to understand the intended audience for your site and index accordingly.
You can specify your Website name, Organisation name and logo that best represents your site or brand, the Yoast plugin will also use this information to configure your website help it to stand out on search engines.
Section 3: Social Profiles – Improving your social media presence!
Next, it’s time to link your social profiles, this allows Yoast to optimise the metadata of your website and content to display properly on these platforms.
Enter all of the social media profiles for your website. If you’re creating a website for an organization, this will be your organization’s social media profiles. If it’s a personal website, you may choose to use business or personal profiles, whichever works best for you.
You don’t need to enter all of them – just choose the social media profiles that you actively want to promote:

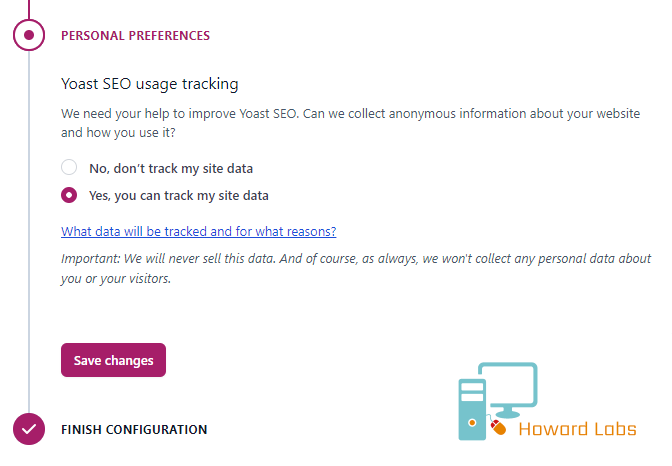
Section 4: Personal Preferences – Usage Tracking options.
The final section, “Personal preferences” allows you to choose whether or not you want to allow the Yoast plugin to track your usage and help improve the product, this is entirely optional and does not impact the performance of the plugin in any way.
Congratulations, you have completed the basic setup of Yoast SEO. Next, we’ll explore some of the advanced features and tools that Yoast SEO offers.
Once you have completed the first-time setup wizard, it is recommended to open the “Yoast SEO” option on the left hand pane of your admin dashboard and continue with additional setup such as “Site Connections”.
Site connections can be used to link the Yoast plugin to external platforms. Google Search Console, Bing Webmaster, Baidu and Pinterest are some examples that help improve metrics and analytics on your website.
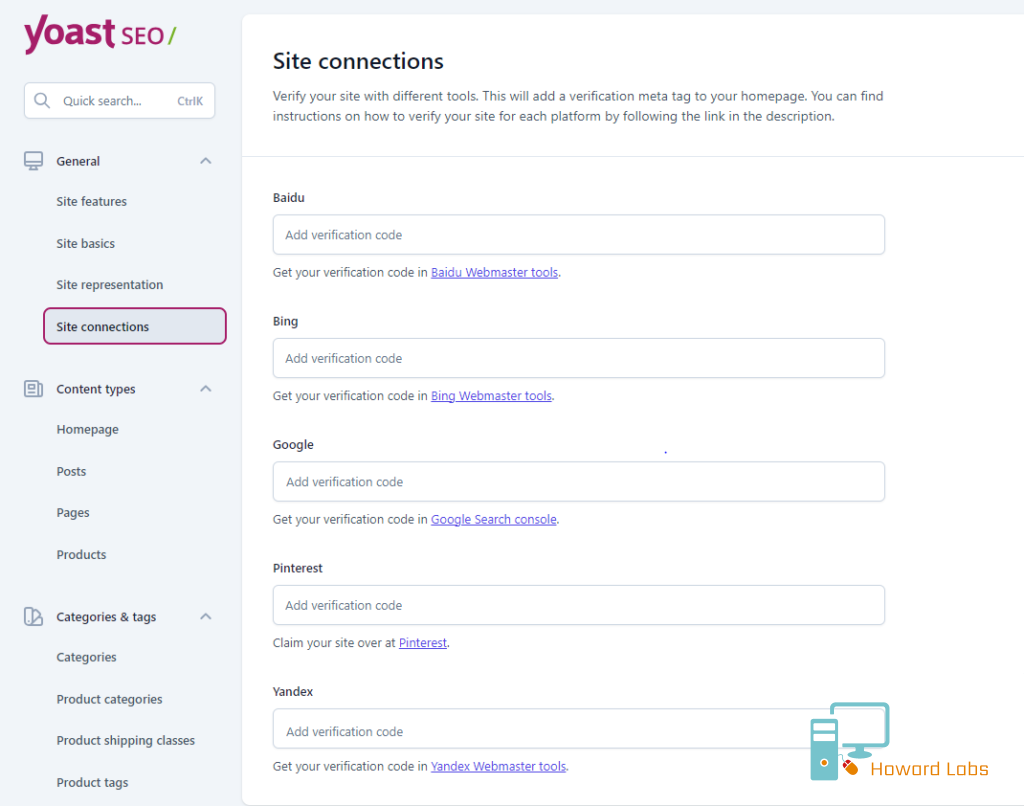
If you do not yet have these configured, you can find more information by clicking on the links provided on the settings page, additionally, check out our post “Google Search Console – A beginners guide” where we guide you step-by-step through setting up and linking your website to Google’s Analytics platform.

You can find useful tips and tricks under the “Academy” section of the admin dashboard under “Yoast SEO”. Feel free to reach out to Howardlabs if you have any queries on how to use Yoast.